In this article we will show you how to customize your Seeko logo from The Stax Header builder plugin.
Follow the below steps:
- Make sure that you have activated the plugin.
- Login to your WordPress admin panel, and access your dashboard.
- You can import a Stax header template from Seeko Panel if you like.
- From here there are two options to which you can access the builder which are:
- Access dashboard >> At the top of the WordPress header click on Open Stax builder
- Access dashboard >> Scroll down till you find the stax plugin >> Click on Stax builder >> Take you to the welcome page and simply click on start stax builder.

After opening the builder you can find the Seeko logo at the top left corner. To edit it click on the image itself and not the settings icon shown after hovering.

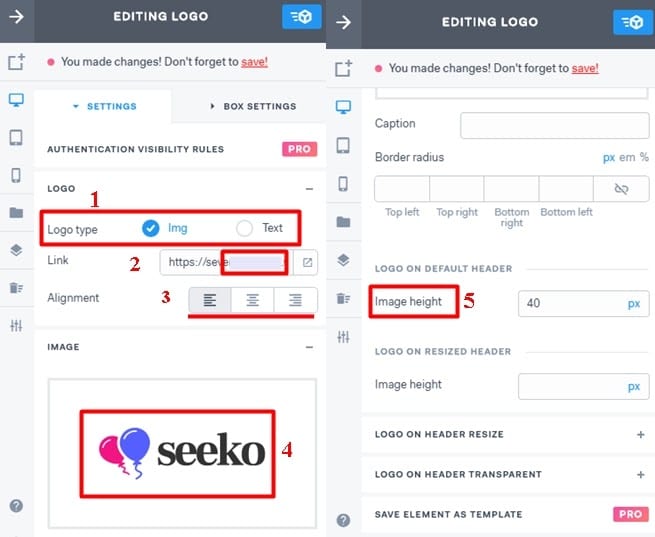
The builder will then show a panel on the right side where you can customize the logo as per your preference. First the logo can be displayed in two formats either by image form or by text form. By default the Stax builder displays your main logo as an image Logo, you can customize the look of this image logo by simply uploading a new image logo if you have one. After uploading ensure you reference your image logo with a link preferably the home page link.

Since the image logo is located on the header you can customize the size of the image depending on if you are using a default header or a resized header. The size that matters most is the image height by default the image size is set to around 40 px and then under box settings the layout height is set to full. For the width it is set to auto since there is enough space not unless you intend to use a wide menu bar.


